
So… I saw this Bell Sleeve Shirt Dress on the New Look website and without a second thought, I’d ordered it:
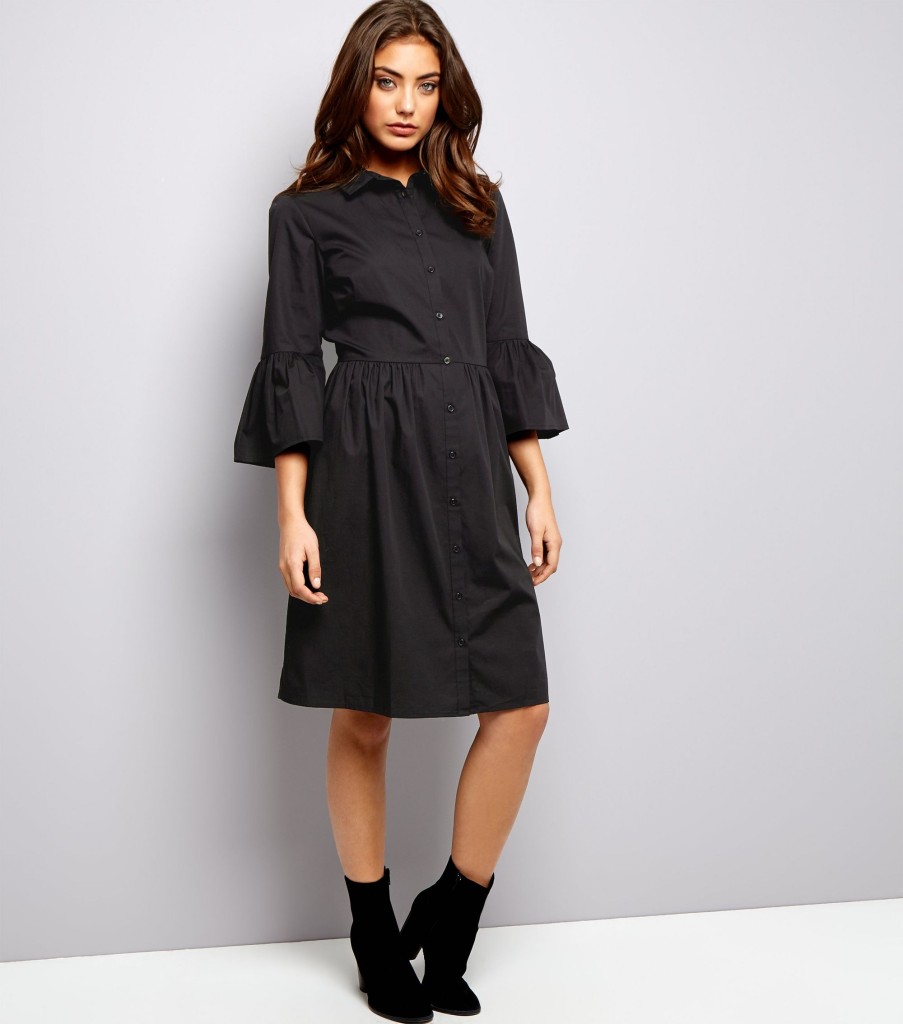
It’s also available in white…
This is from New Look’s regular range – not Petites.
Which meant of course, it would be longer on me – I’d hoped it would be full-on midi-length.
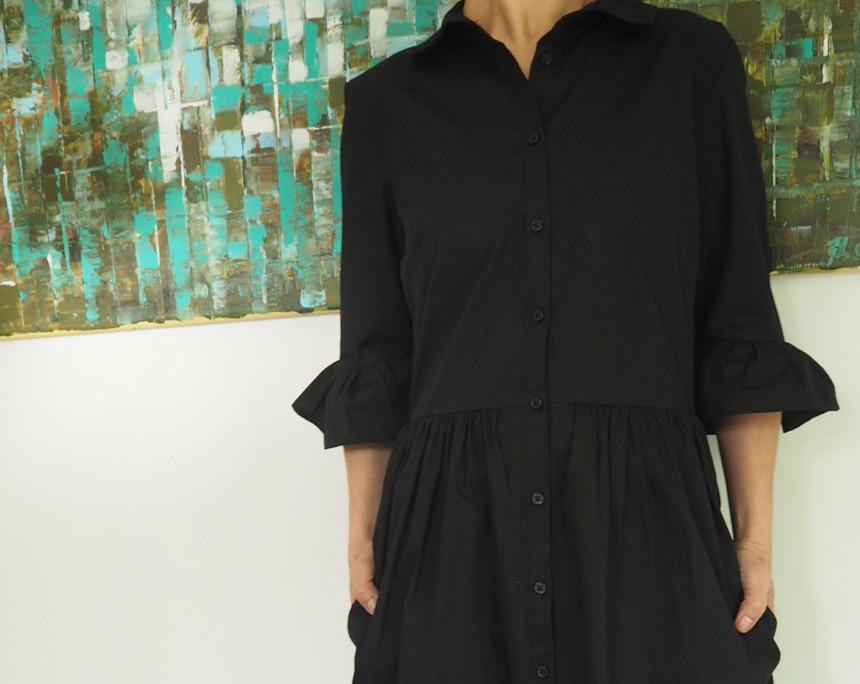
In fact… the only thing about the dress which was bothering me was the sleeves… would they be a bit of a nothingy length on my matchstick wrists? See for yourself:

- Exactly the wrong length: neither here nor there!
As you can see, the length of the dress was neither here nor there on me… probably the exact wrong length: it needed either an extra inch or two, to make it a *true* midi, or it needed taking up by an inch.
And the sleeves? A fraction TOO bell-like on me.
And finally, a possible deal breaker: no pockets!
BUT… the dress cost just £22.99 (I know!) and for that price, I decided it might be worth experimenting with and to go get my sewing-bee on and:
- Add some pockets
- Shorten the frill of the sleeves so that they would be a better proportion on me and
- Taking the hemline up by an inch.
So with a little tweak (or two, or three….!) I figured I might be able to make this dress work for me: in fact, I posted the above (before) pic on my Instagram this morning – mainly as motivation for myself to just crack on.
Now just to be clear:
- I am not a sewing expert, but I do have basic sewing knowledge and I do own a sewing machine (courtesy of my mum – apparently every woman should have one!).
- And pockets? Never sewn any into a dress, but I did follow this YouTube Tutorial I found… as in I watched it about 167 times before anything sank into my pea brain!
I have to say, I feel rather pleased with myself, as I managed to do all the alterations in 2 hours flat – including a quick coffee break!
What do you think?
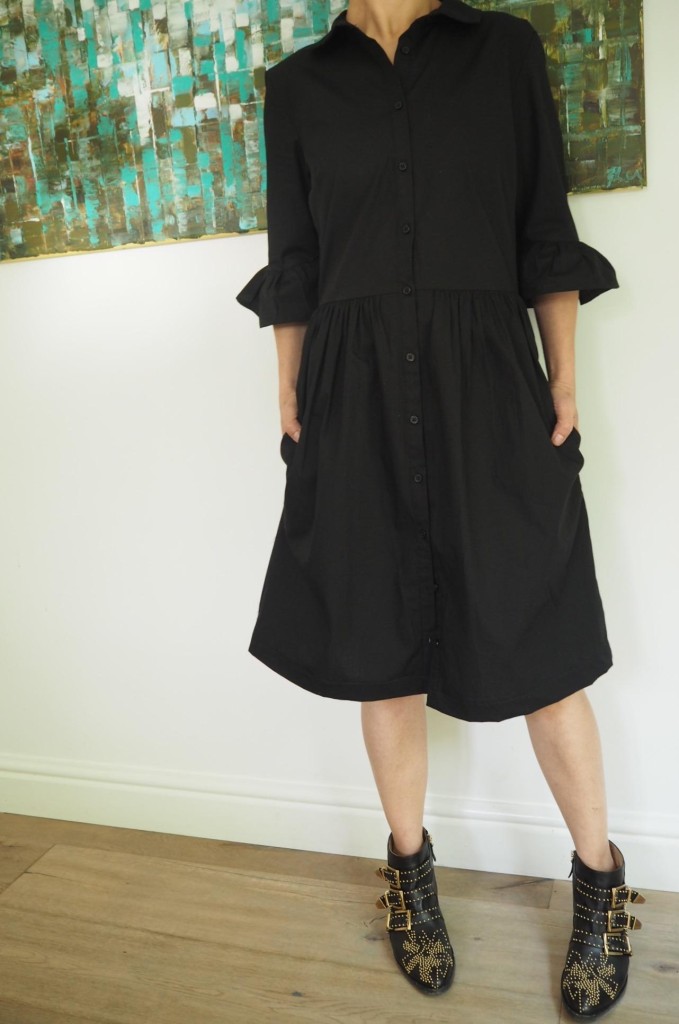
Shortened by 3cms…
If you need a before and after side-by-side:
-
- Before…
-
- …and after!
Here’s the dress with some simple flats:
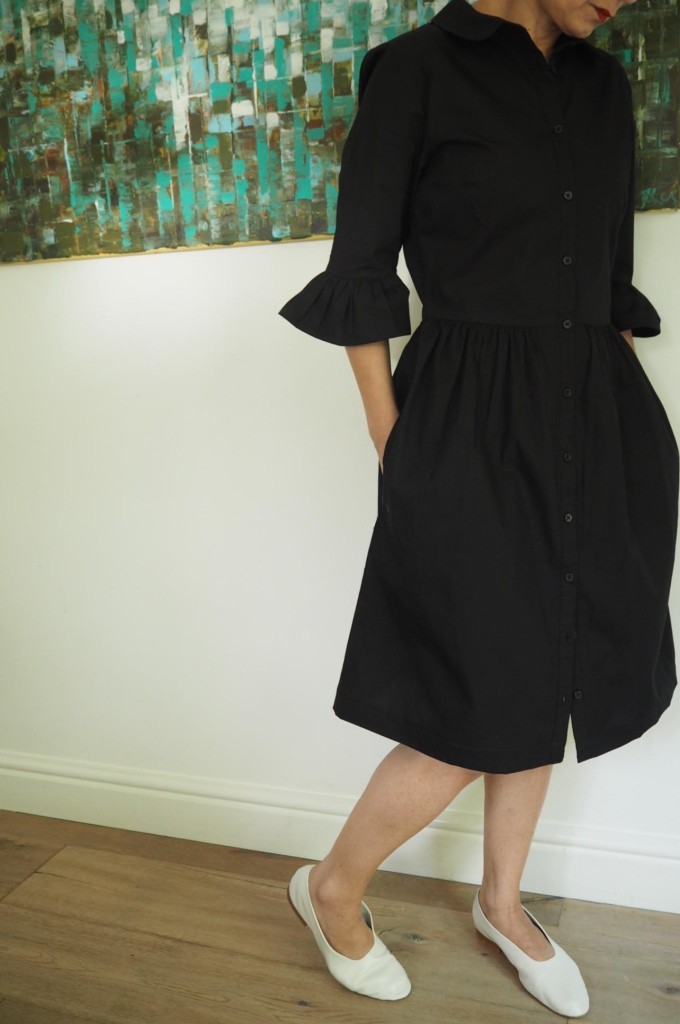
Keeping it simple…
Or you could play around with proportions and wear the dress half unbuttoned over some wide leg crops:
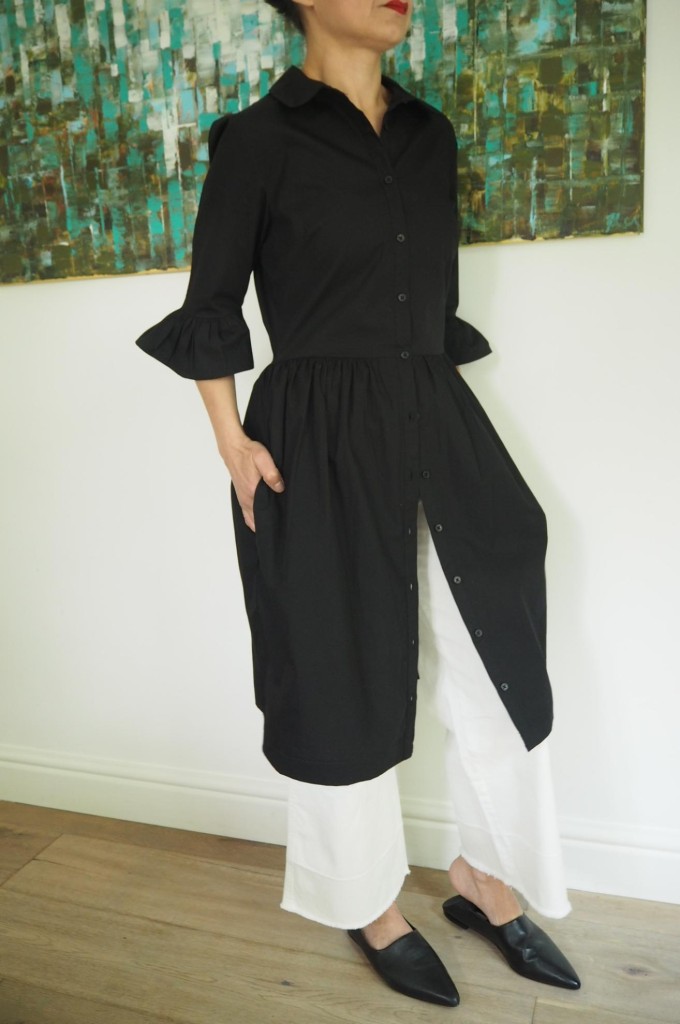
I think I will probably wear the dress like this given our lack of warm Springtime!
And finally, my favourite look, 1950s style neckerchief & sneakers… though admittedly, I do need some new, plain #boxfresh white sneakers for this look:
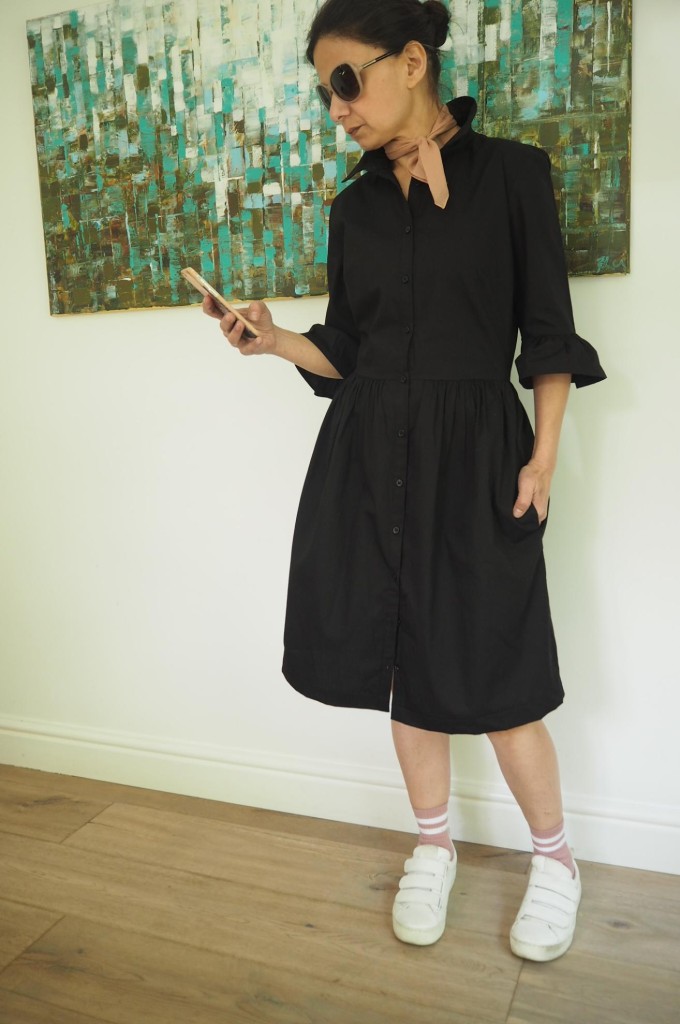
Ignore the scuffed sneaks – it’s as clean as I can get them now as they’re so old!
So over all, I am dead chuffed with my alterations!
A couple of things to note:
- if you want to buy this dress – there are limited sizes left in the Black version online at New Look;
- the dress is 100% cotton, and is a very light-weight cotton – I imagine the white version would be a bit see through;
- I did take step-by-step photos for the pocket alterations bit, and although I’m not very good at giving clear instructions, if you would like me to do a tutorial, I will try and put one together – just let me know. However, I do think you’ll find everything you need on the YouTube tutorial I used.
- I followed the advice on the Tutorial and measured 3inches below waistline for the start of my pocket placement… I should have tried the dress on and placed my hands and marked the dress; or just started them at two inches below the waistline: live and learn though, eh?!
- I reduced the bell-frill by half in the end after pinning it up by a centimetre at a time until I was happy with the proportion of frill on my puny arms; bit of a shame to lose so much of it, but I did what I felt suited my arms. As I’m not the biggest fan of frills, I may well end up taking the frill off altogether eventually which will leave me with a stylish half-sleeve. For now though, I’m happy with it.
- The hem of the skirt was tiny (about 1/2 a centimetre) so rather than painstakingly unpicking, ironing, trimming an inch off (of a very wide hemline) and then ironing two lots of folds before finally sewing, which I’m sure you’ll agree is A LOT of work for a one inch alteration… I simply turned the hem up by 3cms, ironed and sewed a new hem. This means that the lower edge of the skirt is fractionally heavier than the original hem – which luckily, helps weigh the skirt down rather than it being flimsy in the ‘blowing up in a gust’ stakes.
- I have various left over fabrics from a great many failed sewing projects, but I didn’t have any plain black fabric; I bought a 1/4 metre from my local fabric store to make the pockets from: this cost me 60p.
And finally,
- I’m now thinking about really challenging myself and buying the white version and sewing a gathered underskirt/lining into it! #getme, eh?! Because my alterations have gone well today, I rather enjoyed getting all sewing-bee – pretty therapeutic in fact. However, me and a white dress? Who am I kidding!!
All in all, today has been a good day: Mr T was in London so I could get the sewing machine out and make as much noise as I wanted without worrying I was disturbing one of his Skype calls; I did both school runs, fitted in over an hours worth of dog walk, altered the dress, blogged about it and all whilst solo parenting this evening. #feelingsmug
So there you have it: sometimes, it’s good to challenge yourself, don’t you think?
I just need 3 things now: new white sneakers; tanned legs… and of course, warmer weather!
Back for a Sunday 7… til then, thanks for reading!
Bx
P.S. Just after publishing, I noticed an email from New Look – there’s a 25% discount running on dresses… what are ya waiting for?!


There Are 2 Comments
I love it! Especially with the little white shoes. So simple and so very chic! And boy you did well with the pockets – two hours for all the alterations. I salute you! xxx
Thanks Sue! Do take a look at that tutorial vid – it’s a good one! It’s more fiddly to do on an existing dress than if making something from scratch I imagine. I love the flats.., thinking of getting the black too x